JoesTechThoughts
Canon
10 Tips for … Shooting sport and action
Now in bed with iPad on my lap and sleeping children snoring gently I felt inspired to share a few tips on how to capture sporting and other action – these tips apply equally to getting shots of fast moving children and pets as well!
1. Use the “Running Man” scene dial mode – if you are not yet brave enough to move into the more manual settings, and want to stay with the scene modes, the running man icon sets the camera up for action shots. Doesn't matter what kind of action – it could be the children running about, the dog shaking out water droplets after a dip in the lake, or Jess Ennis clearing the high-jump – the thing is that you are trying to freeze the action.
2. Use S mode and set your shutter speed. Similar to using the running man scene dial, the S mode gives you precise control over how long the shutter stays open. As you adjust the shutter speed up and down you will see the camera adjusting the f-number (which controls depth of field) accordingly, as the two settings have a direct relationship. Basically, faster shutter speeds will result in a smaller depth of field, and vice versa. So what shutter speed do you set? Well that depends on the action. People walking or jogging you can freeze with 1/125th sec. The Jess Ennis shot above is probably shot at 1/250th or even 1/500th sec. To freeze the Red Arrows as they cross each other head to head will need 1/1000th or even faster. Practice the type of shots you want and experiment with varying shutter speeds so you become aware of the effect you get at each speed.
3. Use a longer zoom lens. Unless you have a press pass to ringside, you'll probably be in the stands with the rest of us, so a long zoom is an essential to pull in subjects which are a way away and get them filling the frame. You want a 300mm lens or more really, but they do get expensive the longer they get, and the really cheapo 500mm lenses you see on eBay really are not worth splashing out on!
4. Pre-focus to where the action will be. By definition, you are shooting moving targets in action and sports photography. If you rely of the auto-focus of the camera and lens there can sometimes be a slight lag as the camera locks the focus, by which time you've probably missed the shot. So, again using the shot above as an example, you would switch into manual focus mode, and carefully move the focus ring on your lens while looking through the viewfinder, to make the middle of the crossbar pin-sharp. Then, as Jess begins her run up, you start shooting in multishot mode, so your camera is firing of several shots while you hold the shutter down. As Jess comes into your zone of focus she will then be sharp in the shot and the front page of the paper is now yours tomorrow!
5. Scout the best position. Good photographers check out different shooting angles because they know the type of shot they want. Go early, or make a pre- trip to your venue, and work out where you need to be, and how far away you will be, and then you can bring the right lens to get the shots you want.
6. Use a monopod. A tripod is great for getting rock steady shots, but you are working at faster shutter speeds anyway in sports photography, so a monopod is normally enough of an aid to avoid camera shake. Remember the rule of thumb that goes with long zoom lenses – if you are out at 300mm then to get a sharp shot you need a shutter speed of 1/300th of a second. Up at 500mm zoom you need 1/500th sec – that's why professional sports photographers all have the huge zooms which are very fast lenses letting in lots of light to get these shutter speeds – problem is that they cost a fortune!
7. Set Multi- shot on. As mentioned above in point 4, unless I'm shooting landscape, I always set the camera to multishot mode, and take a series of quick shots with the shutter held down. Very often in these sequences of shots you will find that the later shots in the sequence are sharper, because your finger movement from pressing down on the shutter has stopped and the camera is stiller than it was for the first shot or two.
8. Look at other good sports and action photography. As with all photography, a great source of ideas and inspiration is other photographers. The Olympics is a wonderful arena for this kind of photography, and every news outlet has dozens of creative shots which you should file away and use to guide and inform you when you are next at a sports event. Often the key thing is to find an unusual angle – that can turn a standard shot into a really dynamic one.
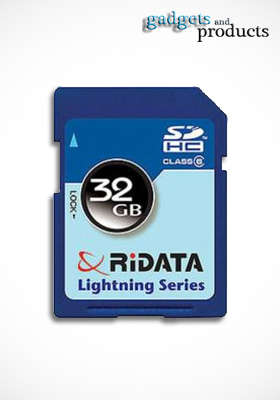
9. Use a fast memory card. Not all memory cards are equal! If action sequences are going to be a feature of your photography, then invest in a fast ca, which will allow the camera to write the photos down to it much quicker than a slow card. They cost a bit more but you don't find yourself waiting for the little light on the back to go out before you can shoot again. It can be very frustrating to miss the shot you wanted because your camera is locked up writing an earlier sequence of shots to a slow card. Get a x166 or higher for sports and action photography, and the bigger the better – cards fill up fast when you shoot sequences.
10. Look for emotion. Nothing brings photographs to life mo than emotion on the faces of subjects. Look to capture the effort, the elation, frustration, disappointment, whatever the emotion is sport tends to magnify it in the moment of triumph or disaster. If you are waiting and ready, these can be wonderful shots to capture.
Do you have any more tips for sports or action shots? If so, please share them as a comment.
Joe Houghton Photography runs small group photo walks, individual 1 to 1 tuition, and photography assignments. You can see some of Joe’s photography on Fine Art America, ArtistRising or on his Flickr site.
If you enjoyed this post, please leave a comment, “Like” it on one of your social media sites or even better subscribe to the blog to get all the posts as they go up. Happy shooting!
32GB Camera Card for €18 from LivingSocial Deals
I got this in my email earlier and had to share it!
Gadgets and Products – Thurs 14th June 2012
One (€18) or Two (€30) SDHC 32GB Camera Cards
I bought 2 – get yours here: https://www.livingsocial.com/deals/370888?ref=conf-jp&rpi=65552658
Summer is here, which can mean only one thing: we’re at our most photogenic after a couple of days on the beach. Top up your camera as well as your tan courtesy of today’s deal from Gadgets and Products and prove your holiday hotness long after the strap lines fade. For €18, bask in the glow of a 32GB memory card for your digital camera or other device (an €87.56 value, with €3.74 paid separately for delivery); or make it two for €30 and snap up double the swimsuit shots (a €175.11 value, with €3.74 paid separately for delivery). We can’t keep this sizzling deal under our sun hat any longer: the SDHC card is compatible with most devices that have an SD slot, and can transfer images, music, video, and more to your computer at high speeds. Click ‘Buy Now’ before today’s deal hides behind the clouds, or wave goodbye to evidence of your gorgeous beach bod.
• PROMOTIONAL VALUE EXPIRES ON JULY 16, 2012
10 Tips for … A trip to the Rockies

Got a call earlier a little while back from a friend who is off to the Rockies. She is a beginner with her camera, still basically using full auto most of the time, but aware that she could do more and wanting to make the most of the photographic opportunities from the trip. However, she is also not going to have lots of time to fiddle to get shots or to learn new techniques during the trip as her partner isn't always very patient when waiting for her to get her shots.
So what tips did I give her?
- Get a polarising filter. For a trip like this, with blue skies, cloud formations, and BIG scenery, a polarising filter (CPL) is essential! Take your normal clear filter off, screw in your CPL and leave it on. Remember to rotate it to see the effect when taking your shots – more on how it works in my earlier post Essential accessories – a polarising filter.
- Go with plenty of space on at least 2 SD cards. I now use 8Gb and 16 Gb cards for normal use. I keep a spare, empty card in my wallet at all times, and always download all my shots from a shoot as soon as I get home, then reformat the card in my camera to leave it clean and ready to go whenever needed. Nothing worse than arriving at a lovely photographic opportunity to find your card is full! More on this in my post on Setting your D3100 up for a wedding shoot.
- Use the mountains scene icon for landscapes. I generally advise beginners to switch from the full auto green camera icon (on Nikons) to a default setting of the Portrait (lady with a hat on) on the scene dial. This gives more pleasing narrow depth of field for shots as has the added benefit of giving faster shutter speeds so more shots come out sharp than in full auto mode. However, for this trip, with big scenery, if you want everything in full focus from front to back, use the mountains icon. The only thing to beware of using this setting is that it will give you slower shutter speeds. So the rule of thumb here is to make sure that your shutter speed ( the number in the bottom left of the viewfinder ) is at least as fast a 1/your zoom setting. So if your zoom is at 50mm, you need to ensure your shutter speed is at least 1/50th sec or faster, but if you zoom in to say 105mm, then your smallest shutter speed shouldn't be less than 1/100th sec. If you do go slower than these numbers, you will very likely get blur from camera shake. And most people can only get away with a shutter speed of 1/30th sec handheld whatever their zoom setting, so keep that in mind…
- Keep shooting! Memory cards are cheap, and how many times are you going to be in the Rockies! So keep shooting – the light never stops changing in mountains. I normally have my camera set to Multi shot mode as typically the second and third shots are sharper than the first as my finger has stopped moving.
- Make sure your camera is set to the highest resolution settings. Don't skimp and be fooled into thinking that getting more shots on your card is a good idea by setting your camera to lower resolutions. Always, always shoot at your top quality and resolution as you never know which of your images will be wanted by a magazine or paper. You can shrink a high-res shot but up-scaling never looks really good.
- Take a backup camera. Loss of your main camera on a trip like this is awful, so always pack a spare, even it it is just your little compact. I always have this with me on trips as well as my main camera, as you never know when you might drop the main one, have it stolen or even run out of battery!
- If printing from your card, shoot RAW & JPG. I would always recommend shooting RAW as this gives you far more data to play with in post processing than JPG. However, if you want to print direct from your cards you need JPG images for most store photo booths, so in this case, go into your menu and select the RAW and JPG option – and always choose JPG fine – the highest quality.
- Take a lens cloth or lens pen. These should be in your camera bag anyway, but always take, and use, a proper lens cloth or lens pen to ensure that your filter's front surface is clean and free of finger marks, grease or scuffs. if using your phone, always give the lens a quick wipe before shooting – see my earlier post
- Use postcards for inspiration. Postcards in the local shops at your destination are a great way to get a feel for the classic best views. Another great source of photo inspiration to check out before you go is the Internet – just type in your destination then choose images. Flickr is another worthwhile source for ideas – it never hurts to have done a bit of homework…
- Change your partner :). Just kidding! But maybe rope them in – give them a camera too!
Take a look at my last post as well on getting the big landscape shots
Some nice Rocky Mountain shots at http://cwmcdonald.com/2012/07/27/breaking-clouds-jasper/
Joe Houghton Photography runs small group photo shoots, individual 1 to 1 tuition, and photography assignments. You can see some of Joe’s photography on Fine Art America, ArtistRising or on his Flickr site.
If you enjoyed this post, please leave a comment, “Like” it on one of your social media sites or even better subscribe to the blog to get all the posts as they go up. Happy shooting! 🙂
Essential accessories – a Polarising Filter
 A polarising filter is an essential piece of kit for anyone who shoots out of doors. It screws into the front end of your lens – if you have different lenses you may need to get different filters for each one – and gets rid of haze, saturates colours and enables you to minimise or eliminate reflections from water and glass surfaces.
There are 2 kinds, but the one you need is a CPL – Circular Polarising Filter. It rotates independently of the lens to which it is attached, and you can see the effect it has on your shot as you look through your viewfinder.
If you put one of these on you can remove the UV or Skylight filter as you don’t need both.
This YouTube video from DSLR Tips.com is an excellent introduction to the basic use of a polarising filter in landscape photography
Do you have any more tips for polarising filters? If so, please share them as a comment 🙂
Joe Houghton Photography runs small group photo shoots, individual 1 to 1 tuition, and photography assignments. You can see some of Joe’s photography on ArtistRising or atThe Canvas Works, or on his Flickr site.
If you enjoyed this post, please leave a comment, “Like” it on one of your social media sites or even better subscribe to the blog to get all the posts as they go up. Happy shooting ![]()
Protecting your DSLR camera lens
I do a lot of training and shoots with people who have recently come into DSLR photography – they have bought or been given a “big” camera and are coming to grips with the new and scary beast!
One of the most common tips I pass on to them are about protecting the lens on their new camera. This isn’t typically an issue on compact cameras as they often have a lens cover which automatically closes when the camera is turned off. But it is a real issue on DSLR cameras, which ship with a very expensive lens sticking out of the front of the camera body, at high risk of knocks and scratches.

Tip 1 – Keep the lens cap on when the lens is not in use. The lens cap is the plastic protective disk which typically grips the inside edge of the lens front. It should ALWAYS be put on when you’ve finished using the camera to protect the lens from accidental knocks in your camera bag or wherever it is kept.
This example also has a strap – really useful when it is elasticated as this fits around the lens barrel and stops you losing it when it’s not in place on the front of the lens.

Tip 2 – Always use a screw in filter on the front of your lens. Every lens you own should have a protective filter screwed into the front thread. This acts as a barrier for knocks, scratches and fingermarks which will damage your very expensive coated lens so easily. It’s a LOT cheaper to replace a screw in filter which has been scratched or damaged than replacing your lens! For typical kit lenses which are normally 55mm diameter, go into your local camera shop and ask for a UV or Skylight filter – small diameter filters from a good manufacturer such as Hama, Tiffen or Hoya will cost 10-30 euros – a bit more if you splash out for a Nikon branded one. As the diameter of your lenses increases, so does the cost of the filter, but never skimp on this – bigger lenses cost hundreds if not thousands of euro, so protect them! These filters screw into the thread on the inside front edge of the lens.
Tip 3 – Don’t buy cheap filters
Even the kit lens on your DSLR is high quality glass, and if it gets scratched is going to cost well over a hundred euros to replace. Better lenses will cost many hundreds or even thousands of euro, so don’t put poor glass in front of those finely tuned optics! You can go onto eBay and get cheapo filters for a few euro, but they are poor quality glass and will degrade your photos. Spend a few tens of euros and you’ll see the difference.
Tip 4 – Use a lens hood

Many lenses ship with a hood in the box, but it’s often left there unused. A lens hood clicks onto the front end of the lens – some connect on the same inside thread as the filters. Either way, they then protect the lens from knocks, act as great rain protectors for the front of the lens or filter, and also cut down on lens flare – those lines of coloured blurry dots of light which you get when shooting towards strong point light sources such as the sun or bright streetlights.

As you can see from the pictures here, lens hoods come in all shapes and sizes, rubber, plastic or metal. The key thing is to get one which matches the front diameter of your lens – the same as the filter.
Joe Houghton Photography runs small group photo shoots, individual 1 on 1 tuition and photography assignments. You can see some of Joe’s photography onArtistRising or atThe Canvas Works, or on his Flickrsite.
If you enjoyed this post, please leave a comment, “Like” it on one of your social media sites or even better subscribe to the blog to get all the posts as they go up. Happy shooting ![]()
ISO – What is it and how do I use it?
Do you ever wish you could get sharper shots when the light starts to go down, without using your flash or using a tripod?
Most cameras these days have an ISO setting, either on a button or somewhere in the menu. This post will tell you how to use the ISO settings to improve your ability to get sharper photos in low light. Thanks to Tony for asking for a post on this subject 🙂
ISO – increasing sensitivity to light
Let’s start by thinking back to before digital cameras, when we used to put film in before we could take photos. I know, seems crazy doesn’t it, and you had to wait for the film to come back from the processing shop before you got to see your shots too. Anyway, with film, if you were going to be shooting in lower light conditions – inside for instance, at a concert or church, you would load up your camera with faster film – the film would be 400 or 800 ASA rather than the normal 100 or 200 setting. This faster film was specially formulated to be more sensitive to light than the normal film, so you could still shoot and get hand held shots without the shutter speeds decreasing to a point where blur from hand shake would spoil the shots.
Nowadays, digital cameras don’t have film, so how do we set the camera up so we can get fast shutter speeds in lower light? By using the ISO setting to make the camera sensor more sensitive to light.
Taking control of your shutter speeds
You need to understand that most people can’t get sharp shots at shutter speeds much less than 1/30th of a second – maybe even 1/60th if your hand is shaky. Your hand and body movements transmit to the camera and introduce blur to your shots. And as you use your zoom the problem intensifies – the general rule of thumb is that whatever the zoom length you are using, you need to have a shutter speed of that zoom length/th of a second to get a sharp shot. So when you are zoomed out to 200mm trying to get little Tommy on stage in his angel outfit, if your shutter speed is less than 1/200th of a second you are unlikely to get a sharp handheld shot.
Yes, this does mean that you need to become aware of your shutter speeds when taking your shots. But that is a fundamental for good photography, and if you want to move away from full auto on your camera and begin to take more creative control, then you need to begin to use this knowledge to make your creative decisions as you take each photo. On most digital SLR cameras, when you are looking through the viewfinder, there are 2 numbers in the bottom of the screen. On compacts this information is normally on the back screen. One of these is the shutter speed, shown as a number which should be read as a fraction of a second. The other is a number with an “f” in front of it – we can ignore that for this post. So if you see 125, that’s 1/125th of a second. If you see 30 that’s 1/30th of a second. But if you see 15, or 8, or 4, they mean 1/15th, 1/8th or 1/4 of a second – all these are slower than 1/30th and when you see these you need to do something or your shot will be blurred. Even if you see 60 (1/60th of a second) if you are zoomed out at 100 or 200mm then you are still going to get movement blur when handheld.
So what ISO setting should I use?
In normal light, a setting of 100 or 200 is fine, and will give you the best quality shots. As you move into indoor lighting, which looks OK to our eyes but is much darker to a camera, settings of 400 or even 800 will give you a chance of handheld shots still being sharp. As ISO doubles, shutter speed halves, so going from 200 to 400 ISO will change your shutter speed from say 1/30th to 1/60th. Moving the ISO from 400 to 800 will halve the shutter speed again – from 1/60th to 1/125th. So you check as you frame your shot for what your shutter speed is, then you can adjust the ISO until you get a speed within the range where you can hold it steady.
So why not just use the highest ISO possible?
Good question. As the ISO number increases, the camera is actually pouring extra power into the sensor. In lower end cameras, the sensor pixels have a tendency to fluoresce as the power input increases, and so higher ISO settings result in some purpley grain-like spotting appearing, especially in darker areas of your shot. This is why it is always best to shoot at the lowest ISO you can, but if it’s the difference between getting the shot and not, then bang up the ISO!
So you use ISO to get handheld shots in lower light by dialling up the setting – the higher the ISO, the faster shutter speeds you get, but the down side is a slightly lower quality of colour graininess.
What about Auto ISO?
Many cameras come with an Auto ISO setting. This will automatically increase the ISO as soon as your shutter speed falls below a given value – typically set at 1/30th or 1/60th of a second (although this can be changed on some cameras). This is great for novices, but one thing to check and adjust is the higher end setting. If the Auto ISO range is say 100 to 3200, then shots taken using 3200 ISO are going to be very grainy looking on compact and entry level SLR sensors. The thing to do is experiment with the settings at 800 and above to see when the results get too grainy for you to be happy, and then set the upper Auto ISO limit to that.
What ISO should I use for night photography?
All the above has assumed that you are handholding your camera. If you are out in town doing a night shoot to get lovely urban or river shots at night, you are on a tripod. In this case, you set the ISO back down to your camera’s lowest ISO setting – probably 100 or 200. And turn Auto ISO off when’re you are on a tripod shooting at night, as you are going to be having shutter speeds of several seconds, even up to 30 or more. Really high quality night shots need the blacks to be proper black with no colour graininess showing, and this needs low ISO.
I hope this has demystified ISO for you. It’s a tricky subject to make accessible, so please leave a comment if you have any questions and I’ll do my best to respond 🙂
Joe Houghton Photography runs small group photo shoots, individual 1 on 1 tuition and photography assignments. You can see some of Joe’s photography on ArtistRising or at The Canvas Works, or on his Flickr site.
If you enjoyed this post, please leave a comment, “Like” it on one of your social media sites or even better subscribe to the blog to get all the posts as they go up. Happy shooting 🙂
Look at good photography…
A great way to gain inspiration and just keep your creative juices flowing is to regularly look at good photography.
One way I get my daily fix is through the Telegraph Pictures for iPad app, which each day gives me a sideshow of a dozen photos. It’s short enough to only take a few seconds to browse through, but there are always some great shots in there which often trigger thoughts of how I might be able to achieve similar results.
Check it out in the iOS App Store:
 |
Telegraph Pictures for iPadThe Telegraph Category: Photo & Video Updated: 10 Oct 2011
|
Light Stalking is another great source of excellent photography which again feeds the soul as well as the ideas bank – the link here is to their website but they do an excellent newsletter which keeps you updated with great photos, ideas and articles.
10 Tips for … Photographing children

Recording the growth and development of your little ones, be they children or grandchildren, is something digital cameras are made for. When we had film it cost so much to develop your shots, and so few came out right – these days it doesn’t matter how many shots you take, you can just keep the ones that work.
Photography is fun! Follow these 10 tips when your children are your subject and you will end up with wonderful shots to keep and look back on in years to come.
They grow up so fast, and if you don’t take that shot today the opportunity may never come again, so get that camera out, load up an empty card, and start shooting! You’ll be glad that you did…
- Keep shooting. A mistake a lot of people make is only to shoot one or two shots. This dramatically reduces your chance of getting the keeper shot, as children never stay still for long, or keep that expression for more than a second or two. Keep shooting – try different angles, zoom in and out, move around the child, but keep shooting.
- Get closer. If you are aiming for a portrait type shot, fill the frame with your child’s face. That’s what you are really interested in after all. Those lovely close ups of the eyes, showing the tiny little lashes and down on a baby’s skin are wonderful images you will treasure for a lifetime.
- Focus on the eyes. If your camera lets you decide where the focus will be, always focus on the eyes, and if the face is not facing you straight on, generally focus on the eye nearest to you. Shots with the eyes out of focus almost never work.
- Choose Portrait mode on your scene dial. Most cameras have various little icons you can select for different types of shot. Use the portrait or baby mode – these set the camera up for head and face shots which will optimise the camera for skin tones, and also reduce the depth of field. This means that the face is nice and sharply in focus, but the background will be slightly out of focus – a much more pleasing photo than having the whole shot in focus.
- Get down low. When I’m shooting children, I normally end up lying on the floor or at least sitting or kneeling down. The best shots of children tend to be from their height, and they have a few years of growing before they are 6 feet tall like me. Being down with them also makes them inquisitive and more likely to engage with you which will result in better shots much of the time.
- Have the camera to hand. A camera is a tool, and so many wonderful moments are missed because the camera is put away. Keep it out, charged and with a memory card with lots of space free, so that when the children start something, you can be shooting in a matter of seconds. My children don’t even see the cameras any more because they are so used to seeing me using them around the house, which means I can get natural, unaffected shots.
- Use your zoom. The best shots of children are often the ones they don’t even know are being taken. I can be in the next room, but with a zoom lens I can fill the frame with the fleeting expression, or capture that pose or frown, recording the moment for ever, when breaking the spell of the child’s concentration would have meant losing the shot.
- Enable Multi-shot. Most cameras these days have a multi-shot option, where you press down on the shutter and the camera fires off a sequence of shots. This is great as it gives you several chances to get the perfect shot, and this is especially important for those key moments like blowing out the candles which can be difficult to recapture, especially as they get older and have more candles to relight!
- Avoid using flash. There are few less flattering lights for skin tones than flash, so avoid using it if at all possible. The lovely translucent, silky look of a child’s face is completely ruined by flash lighting in most cases, so always aim to use natural light, or even normal indoor lighting – you can either change the white balance setting to reduce the orange cast to shots or adjust the image later on the computer.
- Use the children’s stuff as framing and context. I was looking through some shots of Daniel, my one year old earlier on, and as a tiny tot we shot him a fair bit on the brightly coloured play mats he lay on – wonderful colours and textures. I also shot him through the bars of the cot quite effectively, and pram hoods, play bricks – all make great context additions to shots of little ones.

Joe Houghton Photography runs small group photo shoots, individual 1 on 1 tuition and photography assignments. You can see some of Joe’s photography on ArtistRising or at The Canvas Works, or on his Flickr site.
If you enjoyed this post, please leave a comment, “Like” it on one of your social media sites or even better subscribe to the blog to get all the posts as they go up. Happy shooting 🙂
10 tips for … Night photography

Photography at night can be one of the most rewarding experiences you can have behind a camera, and these tips can help you achieve some super results. It’s not difficult, so why not get out and give it a try – you’ll probably be really pleased with the results. I run regular small group night shoots around Dublin – a gallery of participants shots from the Liffey by Night shoots can be seen at here, and one from the O’Connell Street shoots here. Why not come out on a shoot and get shots like these yourself? Click here for shoot details.
- Use a tripod. Depending on your camera, this can be a tiny four inch tabletop model for a phone or compact camera, right up to a full size 6 footer for a big DSLR, but to get crisp, sharp shots at night, the camera has to be absolutely still during a much longer exposure than you can handhold.
- Use the self-timer. If you press the shutter at the start of the shot, there is always a little vibration or camera moment as your finger presses the button. Using the self-timer lets the camera become still on the tripod before the exposure begins.
- Try for light trails. I generally go into shutter priority mode and manually set an exposure time of 8 seconds for light trail shots – this gives lovely long lines of colour from head and tail-lights. Buses look even better as they show up as long swooshes of colour.
- Look for reflections. The lovely colours of lights reflected in water at night can really make a scene, so always look for reflection shot opportunities, and get down as low to the water as you can to maximise the reflections.
- Turn the flash off. This might sound crazy, but unless you are shooting people, turn the flash off. The camera will then keep the shutter open for much longer, letting enough light in to make a lovely shot. If you leave the flash on when photographing scenes at night more than around 20 feet away it isn’t powerful enough to light the scene, so your shots will be very dark and unappealing.
- Catch the “blue moment”. In the 10-20 minutes as dusk falls, the camera will often pick up a lovely dark blue colour in the sky before it turns black. There’s only a very short window of opportunity to get this colour sky, so get setup well ahead of time to maximise your chance of bagging the keeper shot.
- Avoid lens flare. If there are strong lights in shot, and especially if they are close, above you and just slightly in front, then you can end up with lines of blurry coloured circles in your shot as the light bounces around in the lens. Avoid this by fitting a lens hood which sticks out around the front of the lens and minimises this unwanted light effect. Hoods also protect your lens from knocks and the rain too.
- Shoot in colour. Night shots can make great black and white images, but always shoot in colour and do your conversions later in the computer, as you can go from colour originals to a black and white version, but if you shoot in back and white the camera doesn’t record the colour information, so you can’t convert to colour later on.
- Get the ghost shot. On the night shoots I run this is a favourite of many participants! Setting up your camera for an exposure of around 2 seconds and then people walking in shot blur out and become ghostly figures. Exposures more than 5 seconds and moving people don’t even register, so you can get street scenes which appear deserted even though there were people walking about during the exposure.
- Try really long exposures. Exposures of 20 or 30 seconds can give really startling effects. Fast moving clouds begin to explode out of the sky as their movement registers, and river or seawater blurs out to give a lovely silky sheen effect.
Joe Houghton Photography runs small group photo shoots, individual 1 on 1 tuition and photography assignments.


