JoesTechThoughts
Nikon
Always shoot at top quality…

You never know where your photo will end up. A few weeks back, I got a call one day from Carmel Mannion at Jump The Moon PR asking me if I had a photo of the name plaque on Pieta House. I did actually have such a photo, and vaguely remembered shooting the front of the Centre in Lucan several years back. I was sitting at my computer, and while I was being told the reason for the request, was firing up Lightroom and using Pieta House as a keyword, managed to locate the shots.
Now they were taken 4 years ago, and for no more than general photos for possible use in internal website publicity. But I always shoot in RAW and at the highest possible resolution, because of just this type of situation. The requirement was for a hi resolution image suitable for use on the iTunes icon for the Aslan single in aid of Pieta House, “Catch Your Fall”. I pulled a few together – I had actually shot a set of exposure bracketed images, and the one below was selected – great to be able to be a tiny part of this great awareness and fundraiser for a charity I have supported for many years now.
You can download the single from iTunes at https://itunes.apple.com/ie/album/catch-your-fall/id633956107?i=633956108 please do, it's only €1.29.
2012 in review
The WordPress.com stats helper monkeys prepared a 2012 annual report for this blog.

Here’s an excerpt:
600 people reached the top of Mt. Everest in 2012. This blog got about 7,000 views in 2012. If every person who reached the top of Mt. Everest viewed this blog, it would have taken 12 years to get that many views.
Click here to see the complete report.
Getting the shot – Powerscourt Lion

Powerscourt Lion – Joe Houghton Photography
Nikon D300, Tokina 12-24mm lens set at 12mm, F13, 1/500th sec, ISO 250
We had a great photo walk recently shooting the magnificent Powerscourt Gardens in Co. Wicklow, and for this post, I want to take a look at the process I went through to produce the shot shown here, because the original out of the camera looked VERY different. Read on to find out more…
Composition. Before you take a shot, you should be considering the elements in the scene you are facing. Around the house at Powerscourt there are numerous statues, urns and pots of beautiful flowers, and the lions on their plinths caught my eye. Big scenes often benefit from something in the foreground to start the viewer’s journey through your image, and such foreground interest should typically be located on one of the thirds lines. My lion and the vertical of the plinth below his head is a little further left, but this was necessary to compose the house behind as well.
Verticals. Especially with a wide angle lens, it can be difficult to maintain straight vertical lines. The key ones here are on the plinth, so I made sure to keep them vertical – means the right hand side of the house tilts a bit, which I could adjust using perspective correction in Photoshop, but I didn’t this time.
Depth of Field. Another creative decision for any shot is how much of it you want in focus. For this shot I wanted everything from the foreground to the house at the back nice and sharp, so I used A (Aperture Priority) mode on my camera, and selected F13 to give me this. Selecting that on the bright day we had gave me a shutter speed of 1/500th sec – plenty fast enough for a sharp shot handheld. If you are using scene modes on your camera, set your scene to the mountains icon to get a wide depth of field where most of the shot is in focus from front to back.
Focus. The general rule with large depth of field shots is to focus about 1/3 of the way into the scene. Difficult in this case, so I focussed on the lion’s face and trusted the F13 setting to give me enough focus all the way back to the house.
Polarising filter. I’ve written about this indispensable piece of kit in an earlier post, but on a lovely blue sky day it really comes into play, enabling you to darken the sky giving real “pop” to the clouds, lion and the house.
Check Your Histogram. A lot of people, especially beginners, shy away when they run into the histogram display on their camera, but it’s a very simply and VERY powerful information source which you should at least understand the basics of interpreting. Basically all you need to know is that the lines towards the left edge of the window are showing dark areas of your shot, whereas lines over to the right show that there are whiter areas in your shot. If the lines touch the left edge, you’re underexposed, losing detail in the darkness, and if the lines hit the right hand edge, you’re overexposed and blowing out your highlights, losing detail and whiting out areas of your shot.

 On the left here is the histogram for the original shot in the camera – quite dark with no bright areas or white in it. After I’d made the post-processing adjustments I describe below, the final image’s histogram looks like the one here on the right – you can see the tones are much better spread and with no “clipping” on the right or the left.
So what did I do to change my original shot into the final one? By messing about in Lightroom for a few minutes – adjustments to an original image to change it is known as…
Post-processing

 Here are the shots before and after processing, so you can see how different they look.
I deliberately chose a really dark shot for this post to show just what a bit of post-processing can do to an image, especially if you’ve shot in RAW. As long as you don’t over-expose on a bright day, you can pretty much rescue any dark shot as there is much more data stored in the darker end of the image than the bright. My programme of choice is Adobe Lightroom, but the same principles apply whether you use free software like Picasa from Google (a great choice for those just starting), Adobe Photoshop Elements
, or even the big daddy of them all – Adobe Photoshop
.
So everything up to now has been done in-camera, but it was a very bright day, which makes capturing a shot with high contrast like this quite difficult. I was also using my wide angle Tokina 12-24mm lens, and with the polarising filter on the front you can see some vignetting in the corners where the filter is showing at the extreme wide angle setting of 12mm.


Lightroom processing history for the final image
So, reading from the bottom up (because that’s how Lightroom records the changes), here’s what I did to the image. Note – all changes to images in Lightroom are recorded in a separate file from the original RAW image, which means you can always undo them. Hovering your mouse over each line in the History shows the image as it looked at that point in the editing process.
Exposure was my first adjustment – and the original was so dark that I needed to increase by +2.26 stops – that’s quite a lot but you have up to 5 stops either side to play with when shooting in RAW, so as long as the detail is there and you didn’t hit the edge of the histogram, you can bring all the detail back.
Highlights is an adjustment which only affects the very brightest areas of your image, and after bumping up the overall exposure this then added even more punch to the clouds and the roof of the main house, also accentuating the relative darkness of the blue sky behind.
Black Clipping affects the other end of the spectrum, and the minus 13 adjustment here just made the blacks a little bit darker. After doing this I pushed the Highlights even brighter to punch the relative contrast even more, then a very small push to overall Contrast brought things to where I wanted them, with detail retained in the sky but also in the stone of the plinth and the grass in the plinth shadow.
Clarity was my final tonal adjustment – it’s a wonderful setting in Lightroom which punches up the micro-contrast across the whole shot, like sharpening but without the nasty edges which that can leave.
That just left a bit of cropping to lose the vignetting from the filter, moving the image around a little to keep a sliver of grass down the left hand edge, and I was done.
Do you have any more tips on anything I’ve mentioned here? If so, please share them as a comment ![]()
Joe Houghton Photography runs small group photo shoots, individual 1 to 1 tuition, and photography assignments. You can see some of Joe’s photography on Fine Art America, ArtistRising or on his Flickr site.
If you enjoyed this post, please leave a comment, “Like” it on one of your social media sites or even better subscribe to the blog to get all the posts as they go up. Happy shooting ![]()
Related articles
- Ireland’s Highest Waterfalls: Powerscourt (kathrynwarmstrong.wordpress.com)
- Ireland’s Spectacular Powerscourt Gardens (kathrynwarmstrong.wordpress.com)
- 10 Tips for … big landscape shots (joestechthoughts.wordpress.com)
- Depth-of-Field, How to LOVE the Blur (gardenwalkgardentalk.com)
- 10 Tips for … A trip to the Rockies (joestechthoughts.wordpress.com)
- Understanding Maximum Aperture (nikonusa.com)
- How to Shoot Landscapes (nikonusa.com)
- Learning How to Use Your Camera’s Histogram (nikonusa.com)
3 new photo walks for Aug/Sept


Hi everyone – the big news this time round is 3 brand new photo walks. A good friend of mine once told me – to take beautiful photos, go to beautiful places, so we have 3 new beautiful locations – Donadea Forest Park & Lake, Glendalough and Powerscourt Gardens. Check out the booking page for dates and times, and links to the galleries of shots. Make a day of it and go home with lovely photos too!
 We’ve had some great photo walks in recent weeks – a wonderful night out shooting the Liffey, a Botanic Gardens walk where the rain stopped as we arrived and started as we left – great water droplet shots on flowers and leaves as a result! Some of my shots are on Flickr here, and the gallery of participant shots has been updated with some of Lynda’s shots – I love the misty waterfall one – brilliant shot Lynda!
I’ve put some new dates up for the 3 new walks and some of the old favourites at http://www.joehoughtonphotography.ie/courses/ – do come out on a walk and why not bring a friend or two – let’s make the most of the nicer weather while it lasts! And remember, your 5th walk is free – there are a number of people who have done 3 walks with me, so one more gets you an extra one for nothing! A couple of comments back from participants recently:
- Linda – “Thanks Joe, really pleased with the result. We will definitely be booking some more in the near future.”
- Shay – “Congratulations on your teaching skills, I found yesterday’s photo shoot at the Botanic Gardens very informative and helpful, I learned so much in just a few hours.”
Related articles
- Botanic Gardens photo walk – Aug 5th 2012 (joestechthoughts.wordpress.com)
- Ireland’s Spectacular Powerscourt Gardens (kathrynwarmstrong.wordpress.com)
- Glendalough (mackenab.com)
10 Tips for … Shooting sport and action
Now in bed with iPad on my lap and sleeping children snoring gently I felt inspired to share a few tips on how to capture sporting and other action – these tips apply equally to getting shots of fast moving children and pets as well!
1. Use the “Running Man” scene dial mode – if you are not yet brave enough to move into the more manual settings, and want to stay with the scene modes, the running man icon sets the camera up for action shots. Doesn't matter what kind of action – it could be the children running about, the dog shaking out water droplets after a dip in the lake, or Jess Ennis clearing the high-jump – the thing is that you are trying to freeze the action.
2. Use S mode and set your shutter speed. Similar to using the running man scene dial, the S mode gives you precise control over how long the shutter stays open. As you adjust the shutter speed up and down you will see the camera adjusting the f-number (which controls depth of field) accordingly, as the two settings have a direct relationship. Basically, faster shutter speeds will result in a smaller depth of field, and vice versa. So what shutter speed do you set? Well that depends on the action. People walking or jogging you can freeze with 1/125th sec. The Jess Ennis shot above is probably shot at 1/250th or even 1/500th sec. To freeze the Red Arrows as they cross each other head to head will need 1/1000th or even faster. Practice the type of shots you want and experiment with varying shutter speeds so you become aware of the effect you get at each speed.
3. Use a longer zoom lens. Unless you have a press pass to ringside, you'll probably be in the stands with the rest of us, so a long zoom is an essential to pull in subjects which are a way away and get them filling the frame. You want a 300mm lens or more really, but they do get expensive the longer they get, and the really cheapo 500mm lenses you see on eBay really are not worth splashing out on!
4. Pre-focus to where the action will be. By definition, you are shooting moving targets in action and sports photography. If you rely of the auto-focus of the camera and lens there can sometimes be a slight lag as the camera locks the focus, by which time you've probably missed the shot. So, again using the shot above as an example, you would switch into manual focus mode, and carefully move the focus ring on your lens while looking through the viewfinder, to make the middle of the crossbar pin-sharp. Then, as Jess begins her run up, you start shooting in multishot mode, so your camera is firing of several shots while you hold the shutter down. As Jess comes into your zone of focus she will then be sharp in the shot and the front page of the paper is now yours tomorrow!
5. Scout the best position. Good photographers check out different shooting angles because they know the type of shot they want. Go early, or make a pre- trip to your venue, and work out where you need to be, and how far away you will be, and then you can bring the right lens to get the shots you want.
6. Use a monopod. A tripod is great for getting rock steady shots, but you are working at faster shutter speeds anyway in sports photography, so a monopod is normally enough of an aid to avoid camera shake. Remember the rule of thumb that goes with long zoom lenses – if you are out at 300mm then to get a sharp shot you need a shutter speed of 1/300th of a second. Up at 500mm zoom you need 1/500th sec – that's why professional sports photographers all have the huge zooms which are very fast lenses letting in lots of light to get these shutter speeds – problem is that they cost a fortune!
7. Set Multi- shot on. As mentioned above in point 4, unless I'm shooting landscape, I always set the camera to multishot mode, and take a series of quick shots with the shutter held down. Very often in these sequences of shots you will find that the later shots in the sequence are sharper, because your finger movement from pressing down on the shutter has stopped and the camera is stiller than it was for the first shot or two.
8. Look at other good sports and action photography. As with all photography, a great source of ideas and inspiration is other photographers. The Olympics is a wonderful arena for this kind of photography, and every news outlet has dozens of creative shots which you should file away and use to guide and inform you when you are next at a sports event. Often the key thing is to find an unusual angle – that can turn a standard shot into a really dynamic one.
9. Use a fast memory card. Not all memory cards are equal! If action sequences are going to be a feature of your photography, then invest in a fast ca, which will allow the camera to write the photos down to it much quicker than a slow card. They cost a bit more but you don't find yourself waiting for the little light on the back to go out before you can shoot again. It can be very frustrating to miss the shot you wanted because your camera is locked up writing an earlier sequence of shots to a slow card. Get a x166 or higher for sports and action photography, and the bigger the better – cards fill up fast when you shoot sequences.
10. Look for emotion. Nothing brings photographs to life mo than emotion on the faces of subjects. Look to capture the effort, the elation, frustration, disappointment, whatever the emotion is sport tends to magnify it in the moment of triumph or disaster. If you are waiting and ready, these can be wonderful shots to capture.
Do you have any more tips for sports or action shots? If so, please share them as a comment.
Joe Houghton Photography runs small group photo walks, individual 1 to 1 tuition, and photography assignments. You can see some of Joe’s photography on Fine Art America, ArtistRising or on his Flickr site.
If you enjoyed this post, please leave a comment, “Like” it on one of your social media sites or even better subscribe to the blog to get all the posts as they go up. Happy shooting!
10 Tips for … big landscape shots
 Got a call earlier today from a friend with a Nikon D3000 who is off to the States for a holiday, heading into big vista country, and I thought that a few of the tips I passed on might make a useful post.
For a trip like this, there are going to be a lot of “vista” shot opportunities – huge panoramic scenes. So often we try to capture the majesty of these scenes only to be disappointed when the shots just don’t convey the vastness, so what to do to improve such shots?
1 – Zoom right out – Most lenses you will have are zooms, so remember to adjust your zoom to its widest angle – that’s 18mm on most of the Nikon kit lenses. I’m amazed how often I see people I am out on photo walks or 1 to 1’s with just taking the shot using whatever zoom setting their lens happens to be on. Get into the habit of moving your zoom in and out every shot, to see how different shots will look either out wide or zoomed in closer.
 2 – Wide angle lens – Use the widest angle lens you have to make sure that as much of the scene as possible is in shot. If you have a wider angle lens, use it! I have a Tokina 12-24mm
 lens (see top photo) which is fabulous for landscape work, and there are affordable 10-20mm lenses available such as the Sigma one here which are even wider. The difference between a shot at 18mm and one at 10 or 12mm is really substantial, so investing in a wide angle lens is a good option if big landscapes is a subject you want to master.
 3 – What if I only want to take 1 lens? – This question is one of the most common I am asked when I’m doing Nikon training, and it makes sense, especially on holiday, if you don’t want to be lugging loads of stuff around with you. Up until recently, my go-to lens if I only wanted to take one was the fabulous Nikon 18-200mm VR
, but now they’ve gone and brought out an 18-300mm
shown here which is definitely on my wish list! If your budget doesn’t stretch to buying Nikon’s own lenses, there are good (and a lot cheaper) offerings such as the Tamron 18-270mm
and the Sigma 18-250mm
, which are well worth a look.
 4 – Take a tripod – I know that you might not want to lug a big heavy tripod around, but really, how often do you get to the BIG scenery? I’m not saying that you should necessarily take it out with you every day, but for the times when you do have the chance to set it up, especially if you want a low light or sunrise/sunset shot, a tripod will give you the extra sharpness which a big landscape really does need, especially if you want to blow it up when you get home. If you go out to buy one for the trip, carbon fibre ones are much lighter. For travel, I take along a little Manfrotto 785B like this one, which is light enough to slip into my belt for walking around, but then extends to almost 6 foot which means I don’t get a bad back bending down to compose my shot.
5 – Expose for the brightest area – In any high contrast scene, it can be very difficult to get detail in the darker area detail whilst keeping the brighter areas from “blowing out” – going to complete white where you lose all detail. In these cases, expose for the brighter areas, which will perhaps make the darker areas look too dark on your camera screen. However, there is far more latitude in adjusting darker areas on the computer later on, whereas once you’ve blown out a bright area, there’s no getting the detail back.
6 – Shoot to crop – A technique many good photographers use a technique called pre-visualization. As you are setting up for your shot, you should have in your mind’s eye the final output you want. In the shot below, I knew that I was going to crop this as a panorama, and lose a lot of the sky which wasn’t very interesting, so I placed the tree at the front on the left hand thirds line as a scale object, accentuating the massive landscape behind.

7 – Turn VR on – Most cameras these days incorporate some sort of vibration reduction either in the body, or in Nikon’s case, in most of their lenses. By turning this on, shake from your hands or body moving during your shot is greatly reduced, giving sharper shots. I would always recommend buying zoom lenses with VR these days – the non-VR lenses are cheaper but it makes a huge difference to the number of sharp shots you can capture.
8 – Clean your lens/filter – It might sound very basic, but ALWAYS check that your lens (and I hope you have a filter in front protecting it!) and your filter are clean. If not, use a proper lens-cloth or a lens pen to clean the front surface, being very careful to blow/brush away any grit before gently rubbing the filter in concentric circles to remove any grease or fingermarks.
9 – Use full depth of field – Big vista scenes need a big depth of field to ensure full focus from the foreground to the background. If you are using the scene modes, pick the mountains icon, or even good old full auto which will give you a medium depth of field which should be fine. In Aperture Priority mode, you should be using an f stop of 16 or 22. Be aware though, that there is an inverse relationship between depth of field and shutter speed, so as your f-stop number gets bigger, so your shutter speed gets slower, which may result in blurred shots if the light is not brilliant. The rule of thumb is that your shutter speed should be 1 over the lens zoom length to ensure sharp shots. So, if you are at 200mm on your zoom, you need a shutter speed of 1/200th sec, if you are at 18mm for a wide angle shot, you need a shutter speed of 1/20th sec. If you learn to be aware of this, you’ll get more sharp shots.
10 – Look and move around – My last tip is one which will bag you more good shots, but which we all forget to do far too often! It’s easy to become fixated on the scene in front of you, but once you’ve bagged that shot, do a full 360° turn to see what else might be worth a shot. Move a few steps left and right, forward and back – it’s amazing how a slight change in position can dramatically alter perspective and bring new opportunities for shots into view. The shot below was taken in the Royal Natal Park in Southern Drakensburg, S. Africa, just after we had driven in. We parked up for a coffee and there was a 10 foot high grass bank on our right, so I climbed up, to be rewarded with this amazing view, which we then spent over an hour exploring and photographing. But had we just stayed put, we’d never have even known it was there!

Do you have any more tips for big landscape shots? If so, please share them as a comment ![]()
Joe Houghton Photography runs small group photo shoots, individual 1 to 1 tuition, and photography assignments. You can see some of Joe’s photography on Fine Art America, ArtistRising or on his Flickr site.
If you enjoyed this post, please leave a comment, “Like” it on one of your social media sites or even better subscribe to the blog to get all the posts as they go up. Happy shooting ![]()
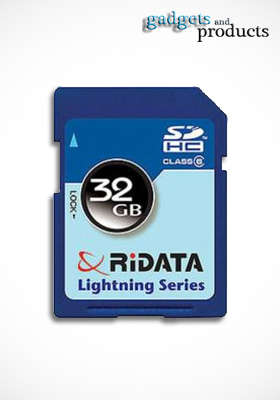
32GB Camera Card for €18 from LivingSocial Deals
I got this in my email earlier and had to share it!
Gadgets and Products – Thurs 14th June 2012
One (€18) or Two (€30) SDHC 32GB Camera Cards
I bought 2 – get yours here: https://www.livingsocial.com/deals/370888?ref=conf-jp&rpi=65552658
Summer is here, which can mean only one thing: we’re at our most photogenic after a couple of days on the beach. Top up your camera as well as your tan courtesy of today’s deal from Gadgets and Products and prove your holiday hotness long after the strap lines fade. For €18, bask in the glow of a 32GB memory card for your digital camera or other device (an €87.56 value, with €3.74 paid separately for delivery); or make it two for €30 and snap up double the swimsuit shots (a €175.11 value, with €3.74 paid separately for delivery). We can’t keep this sizzling deal under our sun hat any longer: the SDHC card is compatible with most devices that have an SD slot, and can transfer images, music, video, and more to your computer at high speeds. Click ‘Buy Now’ before today’s deal hides behind the clouds, or wave goodbye to evidence of your gorgeous beach bod.
• PROMOTIONAL VALUE EXPIRES ON JULY 16, 2012
10 Tips for … A trip to the Rockies

Got a call earlier a little while back from a friend who is off to the Rockies. She is a beginner with her camera, still basically using full auto most of the time, but aware that she could do more and wanting to make the most of the photographic opportunities from the trip. However, she is also not going to have lots of time to fiddle to get shots or to learn new techniques during the trip as her partner isn't always very patient when waiting for her to get her shots.
So what tips did I give her?
- Get a polarising filter. For a trip like this, with blue skies, cloud formations, and BIG scenery, a polarising filter (CPL) is essential! Take your normal clear filter off, screw in your CPL and leave it on. Remember to rotate it to see the effect when taking your shots – more on how it works in my earlier post Essential accessories – a polarising filter.
- Go with plenty of space on at least 2 SD cards. I now use 8Gb and 16 Gb cards for normal use. I keep a spare, empty card in my wallet at all times, and always download all my shots from a shoot as soon as I get home, then reformat the card in my camera to leave it clean and ready to go whenever needed. Nothing worse than arriving at a lovely photographic opportunity to find your card is full! More on this in my post on Setting your D3100 up for a wedding shoot.
- Use the mountains scene icon for landscapes. I generally advise beginners to switch from the full auto green camera icon (on Nikons) to a default setting of the Portrait (lady with a hat on) on the scene dial. This gives more pleasing narrow depth of field for shots as has the added benefit of giving faster shutter speeds so more shots come out sharp than in full auto mode. However, for this trip, with big scenery, if you want everything in full focus from front to back, use the mountains icon. The only thing to beware of using this setting is that it will give you slower shutter speeds. So the rule of thumb here is to make sure that your shutter speed ( the number in the bottom left of the viewfinder ) is at least as fast a 1/your zoom setting. So if your zoom is at 50mm, you need to ensure your shutter speed is at least 1/50th sec or faster, but if you zoom in to say 105mm, then your smallest shutter speed shouldn't be less than 1/100th sec. If you do go slower than these numbers, you will very likely get blur from camera shake. And most people can only get away with a shutter speed of 1/30th sec handheld whatever their zoom setting, so keep that in mind…
- Keep shooting! Memory cards are cheap, and how many times are you going to be in the Rockies! So keep shooting – the light never stops changing in mountains. I normally have my camera set to Multi shot mode as typically the second and third shots are sharper than the first as my finger has stopped moving.
- Make sure your camera is set to the highest resolution settings. Don't skimp and be fooled into thinking that getting more shots on your card is a good idea by setting your camera to lower resolutions. Always, always shoot at your top quality and resolution as you never know which of your images will be wanted by a magazine or paper. You can shrink a high-res shot but up-scaling never looks really good.
- Take a backup camera. Loss of your main camera on a trip like this is awful, so always pack a spare, even it it is just your little compact. I always have this with me on trips as well as my main camera, as you never know when you might drop the main one, have it stolen or even run out of battery!
- If printing from your card, shoot RAW & JPG. I would always recommend shooting RAW as this gives you far more data to play with in post processing than JPG. However, if you want to print direct from your cards you need JPG images for most store photo booths, so in this case, go into your menu and select the RAW and JPG option – and always choose JPG fine – the highest quality.
- Take a lens cloth or lens pen. These should be in your camera bag anyway, but always take, and use, a proper lens cloth or lens pen to ensure that your filter's front surface is clean and free of finger marks, grease or scuffs. if using your phone, always give the lens a quick wipe before shooting – see my earlier post
- Use postcards for inspiration. Postcards in the local shops at your destination are a great way to get a feel for the classic best views. Another great source of photo inspiration to check out before you go is the Internet – just type in your destination then choose images. Flickr is another worthwhile source for ideas – it never hurts to have done a bit of homework…
- Change your partner :). Just kidding! But maybe rope them in – give them a camera too!
Take a look at my last post as well on getting the big landscape shots
Some nice Rocky Mountain shots at http://cwmcdonald.com/2012/07/27/breaking-clouds-jasper/
Joe Houghton Photography runs small group photo shoots, individual 1 to 1 tuition, and photography assignments. You can see some of Joe’s photography on Fine Art America, ArtistRising or on his Flickr site.
If you enjoyed this post, please leave a comment, “Like” it on one of your social media sites or even better subscribe to the blog to get all the posts as they go up. Happy shooting! 🙂
How to Hold a Monopod | reblog from Photography Mad
I have a monopod and use it, but never considered how versatile a tool it really is until I read this excellent piece…
Essential accessories – a Polarising Filter
 A polarising filter is an essential piece of kit for anyone who shoots out of doors. It screws into the front end of your lens – if you have different lenses you may need to get different filters for each one – and gets rid of haze, saturates colours and enables you to minimise or eliminate reflections from water and glass surfaces.
There are 2 kinds, but the one you need is a CPL – Circular Polarising Filter. It rotates independently of the lens to which it is attached, and you can see the effect it has on your shot as you look through your viewfinder.
If you put one of these on you can remove the UV or Skylight filter as you don’t need both.
This YouTube video from DSLR Tips.com is an excellent introduction to the basic use of a polarising filter in landscape photography
Do you have any more tips for polarising filters? If so, please share them as a comment 🙂
Joe Houghton Photography runs small group photo shoots, individual 1 to 1 tuition, and photography assignments. You can see some of Joe’s photography on ArtistRising or atThe Canvas Works, or on his Flickr site.
If you enjoyed this post, please leave a comment, “Like” it on one of your social media sites or even better subscribe to the blog to get all the posts as they go up. Happy shooting ![]()


